A pretty complex pose
Chaturanga Dandasana is one of the most complicated poses in yoga asana. There’s something happening in nearly every part of the body at once, and it asks for a lot of strength and a lot of breath. It’s also the pose that gets blamed, over and over again, for shoulder injuries in people who’ve been practicing for years.
I don’t think the pose is the problem. I think it’s the speed at which most people practice it. In a flow, Chaturanga goes by in a single breath, sandwiched between Plank and Up Dog, and nobody ever slows down long enough to find out what’s actually supposed to be happening. So let’s slow down and take our sweet time with Chaturanga Dandasana (pretty majestic name, right?!).
One tip before you start: take a photo of yourself in this pose, or work in front of a mirror. You cannot feel most of what goes wrong here, especially around the shoulder blades.
Build the shape before you lower
Hands. Spread the fingers as wide as they’ll go, thumbs almost as wide, and press down through every single knuckle where the fingers meet the palm, and especially the index knuckle. That’s the one that likes to pop up, and when it does you roll onto the outer edge of the hand and load the outside of the wrist instead of the whole joint. If your wrists don’t like weight-bearing at all, make fists.
Wrists go directly under the shoulders. That is the general cue and it works for most people, but where your hands actually want to be depends on your arm anatomy, so treat it as a starting point rather than a rule.
Head. Neutral. Not hanging down, not lifting to look forward. The same easy neck you have in Sukhasana.
Chest. Starburst it open: collarbones broadening apart, sternum stretching forward. Find this standing up first, imprint it, then bring it into the pose.
Core and hips. Here’s what you’ll notice as soon as you lift the heart: the belly dips and the low back starts to sag into a hammock. Counter it by corseting the waistline. Draw your ribs in toward the midline, navel back toward the spine, low belly lifting, everything wrapping around the sides toward center. Then lift the hips just a fraction. That tiny lift switches on the psoas and the hip flexors, and it’s what saves your lumbar spine.
The opposite error is just as common: hips hiked way up while the chest dips down. Both come from the same missing core.
Breath is king
If I had to rank everything in this pose, it would go: breath first, then core, then the shoulders and the angles, then spinal neutrality, then the legs.
Breath is at the top for a reason. The moment you engage the core and the hip flexors you create a lot of intra-abdominal pressure, and almost everyone responds by holding their breath. If you can’t breathe fully and evenly, come down. Drop the knees, take Child’s Pose, modify however you need to, but keep breathing.
The two shoulder rules
One: don’t go below 90 degrees. The front of the shoulder should stay level with the elbow and never sink lower. When it does, the head of the arm bone presses forward into the front of the joint, and repeated over years that’s wear and tear you don’t get back.
Lower down so your shoulders land no lower than your elbows. And going only halfway is fine forever. If 45 degrees is where you’re stable, stay at 45 degrees. You’ll still get stronger, and one day you’ll go further without the wobble.
Two: elbows in toward the ribs. Elbows drifting out to the sides internally rotates the upper arm and the shoulder joint, which is the least stable place to be under load. The triceps are what keep the elbows in, and most of us barely use our triceps in daily life.
In case you’re thinking “Oh, but gym push-ups are done with the elbows wide, people do them for decades, and they’re fine. Why are we so strict in Chaturanga?” The difference is where the weight sits. In a traditional push-up, your weight is below the shoulders. It’s really just the head and neck up there. In Chaturanga you shift forward first, and that puts your whole upper body weight into the shoulder joint. Same-ish shape, but completely different load.
Angel wings
Watch someone lower into Chaturanga and you’ll often see the shoulder blades pop up off the back like little wings. That means the rhomboids and lower traps aren’t yet strong enough to glue the scapulae down. This is extremely common, especially for people who sit at the computer a lot.
The fix in the pose is two opposing actions at once: the serratus anterior wraps the shoulder blades around the sides of the ribs, and the rhomboids squeeze them toward the middle. Pull in both directions and the blades stick. Pressing strongly down into the floor helps too because it fires the pecs and stabilizes the whole girdle.
The fix out of the pose is scapular push-ups: in tabletop, lift and lower the chest like an elevator without bending the elbows. This one is not a quick fix. It’s a project.
You can’t see winging on yourself, and a mirror won’t show it either because you’re not weight-bearing. Get someone to photograph you from a profile angle in a top that shows your upper back. Either it looks flat, or you’ll see two little mountains.
Props and variations
The strap is the best tool for this pose. Loop it shoulder-distance apart around your upper arms and tighten. Now the elbows physically can’t flare, and the chest lands on the strap, which stops you dropping below 90 degrees. It solves both shoulder rules at once.
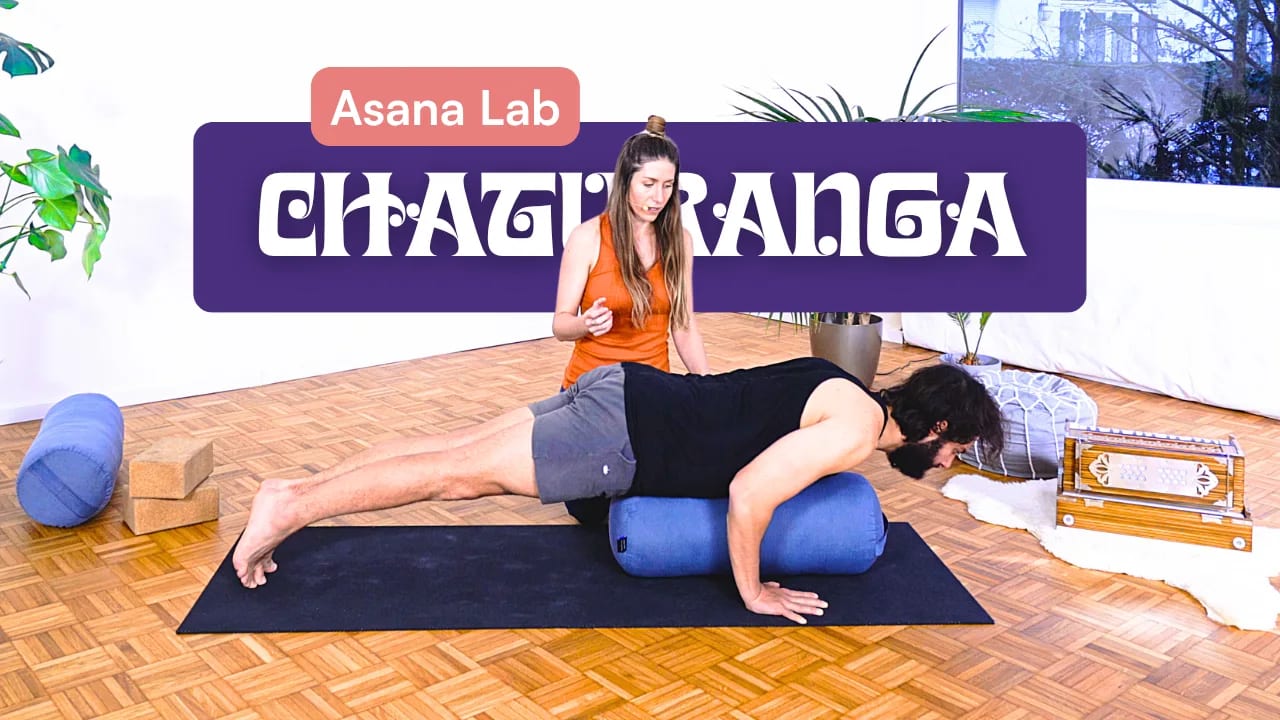
A bolster under the chest and belly gives you a soft landing to work against. Chaturanga light. Perfect for focusing on the shoulder blades and the core without worrying about the descent.
Blocks under the hands are not automatically easier. They lengthen your arms, which changes every angle in the pose, so some people find them harder. They genuinely help if the limiting factor is wrist pain or upper body strength, because they tip some of your weight back toward your hips. If they just make you wobble, save them for later.
Leg variations, easiest to hardest: knees down with feet down; knees down with the feet lifted and ankles crossed; eka pada with one knee down and the other leg extended; then one leg lifted with no knee down, which asks a lot of the core because the shape is asymmetrical. Pressing up into Chaturanga from the floor is harder again: hands back by the ribs, lift from the hips.
My preferred modification is knees down, lie down. Knees to the mat, then lower the whole torso like a drawbridge, forehead and nose to the mat, then Cobra. Not knees-chest-chin. I stopped teaching that one years ago because it puts a big backbend into the neck, and enough students have come to me with whiplash and disc issues that it stopped feeling worth it. The pose you’re going into next is a backbend anyway.
If you’re the one teaching it
Teach the modified version first. In an open class with new faces, I take everybody through knees down, lie down for the first rounds of Surya Namaskar before Chaturanga is ever an option. That way the modification is already established as normal, and later you can just say “Chaturanga, or the version we took earlier.”
Before you flow, run it once slowly: hasta bandha in tabletop, then Plank, then the shift forward and the elbows back, with the shoulder cue said out loud. One breath is not enough time to teach anything.
And if you keep cueing it and keep seeing it done badly, do a demo. Gather everyone in, show the common mistake once, then show the angle you want. Watching it land is worth 20 verbal cues.
Worth knowing: when a teacher keeps telling you to shift “forward, forward, forward,” what they usually want is that clean 90-degree elbow, and if you’re already rolling off your toes, the issue is probably hand placement, not effort.
Read the rest — it is free
Enter your email and the full lesson unlocks right here. We will send you the link too, so you can come back to it.
By submitting you agree to receive emails from Movement Wisdom. Unsubscribe any time with one click. Learn more