A lot of effort for not a lot of movement
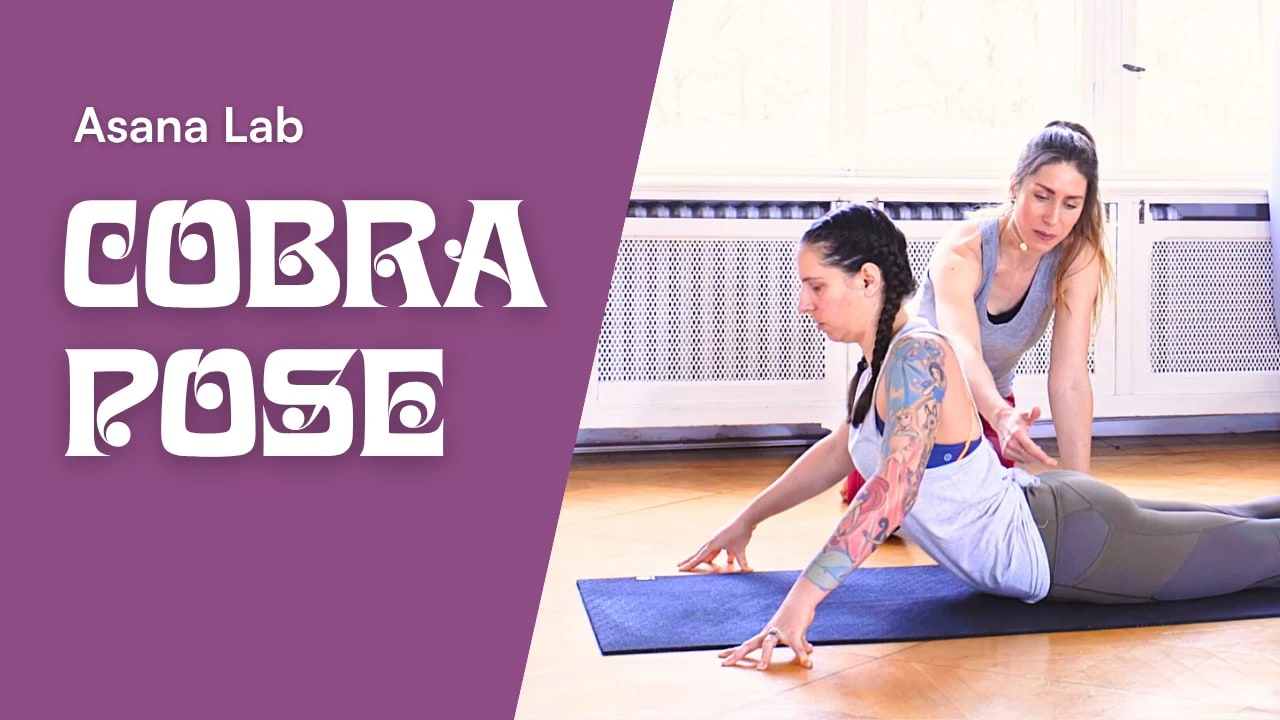
Face-down backbends are everyone’s favorite category of pose. (They are nobody’s favorite category of pose.) You get a whole lot of effort for not a whole lot of movement: the entire back of the body working, the sides of the waist, the glutes, the hamstrings, the backs of the arms. And meanwhile you have traveled a couple of inches off the floor. Cobra Pose, Bhujangasana, is where that’s most obvious, because from the outside almost nothing is happening.
That gap between how hard it feels and how little you can see is where the pose goes wrong, because the natural response is to try to get higher: chin up, head back, press harder into the hands. It does make the backbend bigger, but it puts most of the bending into the neck and the low back, which are the two places that need it least. So instead of focusing on lifting only, focus on lengthening your spine as well.
Start with the legs
Lie down on your belly and pick up your feet one at a time, stretching them back toward the back of the mat. That alone makes more space in your low back. From there, set the feet hip distance apart with the big toes pointing straight back.
Now press the top of every toe into the mat and watch what your thighs do. Press only the big toes and you get external rotation of the thigh bones, while pressing only the pinky toes gives you a lot of internal rotation. We want the middle ground, which is all 10 toes down.
Then press strongly into the tops of the feet, which lifts your kneecaps, and contract your quadriceps so they lift further. Now the whole lower half is switched on from the toes to the hips, which keeps the low back neutral and helps you find the low belly. You need the low belly, because there’s a great deal of effort happening in the back of your body and something has to balance it in the front.
Foot width is personal. Some people come up with the feet hip distance apart and feel a pinch around the sacrum, the triangular bone at the bottom of the spine. If that’s you, play. Try the feet together, pressing the pinky toe edges down, then try them mat distance apart. You’re after the thigh bones entering the pelvis neutrally, and where that happens is bone structure, not something you can stretch your way into.
Set up before you lift
Hands under the shoulders, and treat that as an area rather than a point, because where your hands want to be depends on your arm anatomy. Spread the fingers wide and find your hasta bandha.
Then, still lying flat, exhale and do two things: pull the low belly up and in, and slide your tailbone down toward your heels. That lengthens the lumbar spine before you go anywhere, so the backbend can spread across the whole spine instead of collecting in the one place that bends most easily.
If “slide your tailbone toward your heels” has never meant anything to you, stand up for a second and imagine you’re lying on your stomach. Lift your tailbone up and back behind you, and you’ll feel your frontal hip points drop while your low back arches. Now do the opposite, lengthening the tailbone down and lifting the low belly toward your sternum. That’s the one, and yes, it’s the same thing as tucking your tailbone.
Think of the low belly as an airbag puffing out in all directions to protect the lumbar spine. You’re not gripping it flat, you’re inflating it.
Last piece of the puzzle: pull the heads of the arm bones and the fronts of the shoulders back, squeezing the shoulder blades together and down before you lift.
Lift forward, not up
On an inhale, roll the chest forward first, then lift, rolling the shoulders back as you go. Forward before up. Shoulders rounding forward won’t injure you, but it closes the chest, and opening the chest is most of what we came for.
To find the forward part, put your attention on the back of your heart, the space in the middle of your chest between the tips of your shoulder blades. Stretch forward from there as you lift, and keep stretching the whole time you hold. Then press down into your hands and, without moving them, energetically drag them back toward your feet. Your chest slides forward through your arms, which brings the rib cage behind your heart forward and sends the extension into your thoracic spine, the region that’s genuinely hard to reach in a backbend and the one most of us need it in.
The head is the other half of this. The tendency is to throw it back and lift the chin, because that feels deeper, and it is deeper, but only in your neck. Bring the head in line with the rest of the spine instead. There’s a natural curve in the cervical spine already, so you always have a little backbend up there without adding one.
Cobra or Up Dog
So what’s the difference between Cobra and Upward-Facing Dog? It comes down to the hips. In Cobra the hips and knees stay on the floor, however big the backbend gets, including the straight-arm version. In Up Dog the hips and upper thighs lift, the knees lift, and the arms are straight. Everything else follows from that.
The most important consequence is hand placement, and unfortunately most yoga teachers don’t cue it at all. Cobra takes the hands under the shoulders, while Up Dog wants them further back, next to the ribs with the elbows over the wrists. You only need to cue the change when students come down onto their bellies first, because when you come through Plank into Chaturanga, the forward shift has already carried the hands back beside the rib cage.
Variations and props
Baby Cobra is the strength version. Set up as usual, then lift the chest, head, and hands off the mat together, pressing the pubic bone down and sending the back of the heart forward. With no hands on the floor your back muscles do the lifting. Float the feet too and you bring in the hamstrings and glutes, keeping the pinky toes pointing straight back.
Blocks open more space in the chest. Hands on the blocks, hasta bandha still active, thumbs and pinky fingers curled around the edges for grip. Same actions, but the extra height is a good option if lifting the chest in standard Cobra never quite happens for you. Play with the position: close in, further forward, out to the sides.
Spidey hands. Hands wide and up on the fingertips, fingers and thumbs drawing toward each other so the center of the palm domes up. I went through a phase where this was the only Cobra I ever taught, because you get so much more extension in the upper back.
Small twists. Bend the elbows and turn to look toward your hips, with both hips firmly planted. Roll a hip up and you’ve put a twist into a backbend, which can tweak the sacrum if there’s any weakness there.
Sphinx when the arms are the problem. Elbows under the shoulders, forearms down, palms flat or hands in anjali mudra. You get most of the benefits of Cobra with far less strain on the wrists, elbows, and shoulders, so reach for it with wrist trouble, elbow tendonitis or tendinosis, or a cranky shoulder.
A blanket under the hip points. I have very spiky frontal hip points, and for a whole series of belly-down backbends I fold a blanket under them. For some people it’s the pubic bone that bruises instead, and the blanket handles that too.
Straight arms may simply not be available to you. If you straighten your arms and hit a hard stop, that’s usually not tightness in the front of your body. It’s the bones of your spine meeting each other, and there is no deeper Cobra past that point. Bernie Clark writes about this in Your Spine, Your Yoga: compression is not an injury, and joints need to reach their end range to stay healthy. It only means the straight-arm version is a different proposition for you than for the person on the next mat.
If you’re the one teaching it
Cue the legs before you cue the lift. Prone backbends are where everybody forgets the legs, and the legs keep the low back out of trouble.
Don’t cue “relax your glutes.” That’s impossible in Cobra, because the glutes are the muscles that take your legs behind you, so in a backbend they are working rather than resting. The cue has good intentions, though. It’s trying to stop the biggest glute muscle from taking over and rolling the legs out, and you can say that directly by cueing all 10 toes down. The second cue to avoid is “squeeze your bum to protect your spine.” Squeezing does take you deeper into the backbend, but I can’t see how it protects anything.
Finally, watch out for the student who straightens the arms the moment they come up, shoulders rolling forward and chin jutting. Ask them to come down a little, because from lower it’s much easier to squeeze the shoulder blades together, slide the chest forward, and bring the head back into line. If someone can hold straight arms with an open chest and a long neck, though, leave them there.
And be sure to offer the whole menu out loud, because students default to whichever version they think is the proper one.